Trying and setting up WSL 2
Tips for setting up WSL 2 environment
The year of Linux desktop has finally come. It’s Windows + WSL 2. Seriously.
I use a MBP 16 for my daily work and SSH into linux machines for development/testing. While it’s a fantastic machine (and the track pad is second to none), I just hate the Apple trying to lock down the system so much that even setting up gdb to work is a nightmare, and running any simple script it tries to phone home for validation.
So I tried installing Linux on my machines. I do have a personal laptop X1 Carbon Gen7, but it doesn’t work well with Linux: mostly Linux just doesn’t like the 4 Channel Dolby Surround Speakers - they sound something from a tin-can and volume is much lower. While in Windows the sound I get is actually pretty nice (for a laptop, of course). I have spent countless time on it and I’ve seen many people struggling through the same issues. There are also occasionall hipcup with suspend/resume, but I can live with that. I also have a powerful gaming PC which I mostly play games. WSL sounds like a perfect solution for those machines where I can use Windows for their compatiblity / games, while also use it for development / tinkering on Linux. Yes, you can either dual boot or install a linux VM, but the integration between WSL 2 and Windows seems pretty nice to me, so I decided to try it out - and now all my Windows machines have WSL 2 installed.
Setting it up is not too bad - you do need to follow the official instructions to install it, which I’m not going to repeat here. The installation experience was fairly smooth, though it requires multiple steps.
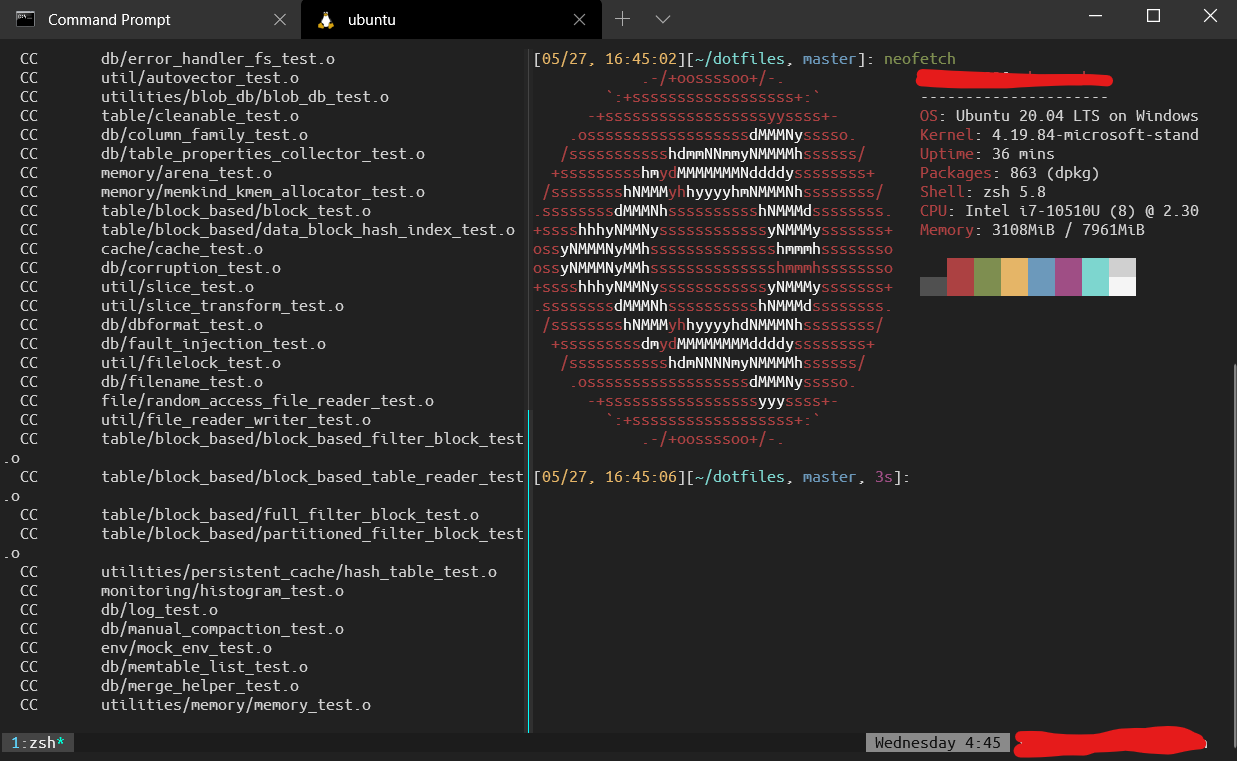
However, to get it work properly requires a bit of extra work. Once you set it up it’s pretty much all I ever needed. Here is what it looks like when I’m done:
Install WSL Remote extension on VSCode
When you launch VS, it’ll automatically prompt you to install WSL Remote extension. Once you done installation, just open code from WSL:
code <folder>
Once you do that, it’ll install VSCode Server automatically and launch VS code pointing to that folder. And you can browse through the code as usual.
And the best part is, once you install corresponding remote version of the extension (for example, C++ Extension), IntelliSense works! The installation of remote extension is a bit tricky - you need to find your extension again, and click the little green button “Install in WSL Ubuntu”.
You can refer to the official doc for more details.
Moving it to another disk
By default, WSL forces you to install it on C: drive, which makes no sense what so ever in 2020. I suppose this is a Windows Store thing. Fortunately, there is a move-wsl tool available in github. There is a powershell script and a simple batch file. I’m going to use the batch file:
# Move ubuntu distro to D:\vm
move-wsl.bat ubuntu D:\vm
It’ll move Ubuntu distro to D:\vm, and that’s basically a huge ext4.vhdx file.
Once you launch WSL again, you may find the default user has become root. Don’t worry, just put the following into /etc/wsl.conf:
[user]
default=YOUR_USERNAME
And go back to a windows prompt to terminate the running WSL ubuntu instance:
wsl -t ubuntu
The next time when you launch WSL you’ll be going back as your normal self.
Limiting memory growth
By default WSL 2 is setup to consume up to 80% of system memory which is way too high. In my 16GB laptop I’m setting this to 6GB (8GB is still too high with a few chrome tabs open and VSCode open side by side). As far as I can tell this is due to cache - linux is going to go memory hungry to use all the memory it can use for caches, but when windows needs that memory there is no way for linux to know that, unless you force linux to GC the unused memory more aggressively (see this article for more details). But I’m hoping for a better long term solution where you can have the two OS talk to each other in some ways to negotiate memory usage. Before that happens, you’ll need to write following to %USERPROFILE%\.wslconfig.
[wsl2]
memory=6GB
swap=0
localhostForwarding=true
If you are using this on a workstation with 32GB+ memory, you might not need this. Though it is still likely that it’ll happily consume everything when you do some heavy processing like compiling source code with 24 cores.
Terminal
Windows Terminal is a modern terminal that supports different shell like ubuntu shell, cmd, powershell, etc. I find it works well with zsh/tmux and supports color themes and good font rendering, so that’s the one I’m using right now.
I’ve set it up with Ubuntu Mono font and Afterglow theme so it looks fairly close to a Terminal under linux.
Setting up git credentials
Because there is no desktop support there, you can’t use libsecret which uses dbus. If you set it up, you’ll eventually run into this error:
** (process:7902): CRITICAL **: could not connect to Secret Service: Cannot autolaunch D-Bus without X11 $DISPLAY
Fortunately, given this is windows and WSL supports Windows Interop, you can just use git-credential-manager.exe which works surprisingly well:
git config --global credential.helper "/mnt/c/Program\ Files/Git/mingw64/libexec/git-core/git-credential-manager.exe"
Docker
You can install docker as usual, but whenever you try to launch any container you’ll get this error:
docker: Cannot connect to the Docker daemon at unix:///var/run/docker.sock. Is the docker daemon running?.
This is because there is no systemd installed. As a result docker doesn’t know how to automatically launch docker daemon. You can still do it in the good old system-V style:
sudo service docker start
Copying text to clipboard in tmux
Under regular linux you could juse use xsel / xclip which isn’t an option here as there is no X window installed. Again, because there is Windows interop, you can juse use clip.exe!
You can set it up in tmux so that it integrates with your clipboard.
bind-key -Tcopy-mode-vi 'y' send -X copy-pipe "clip.exe"
I have a script that auto detects Linux/Mac/WSL and use the correct copy tool correctly in github based on https://github.com/Parth/dotfiles/blob/master/utils/copy.
My overall impression
WSL 2 is really a game changer. WSL was a good start but given that it is done through implementing linux sycall on top of windows (interop, basically), compatibility is a big issue. It’s hard to be productive when you hardly trust your environment. With WSL 2, you can run Windows and Linux literally side by side and have them talk to each other through WSL interop, so really you get the best of both worlds - the compatiblity of Windows (linux on laptop is still quite a hussle, especially for newer hardware) and the fantastic open source dev environment of linux. There is some trade off, but it’s worth it.